Showing posts with label stencil. Show all posts

Wednesday, November 29, 2017

ARTplorations Stencil Blog Hop


Hi friends! Today I have two simple and clean Christmas cards made for ARTplorations Stencil Blog Hop!

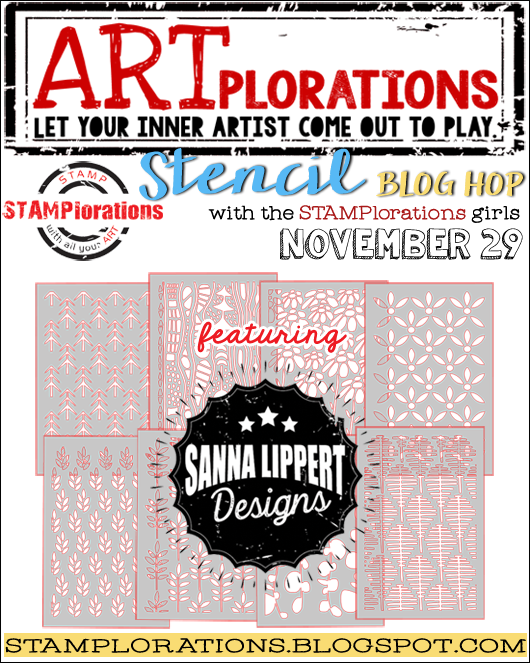
This hop is an one-day event where STAMPlorations ladies feature the 8 stencils designed by Sanna. Sanna's stencils are now in the STAMPlorations store, you can check out this page for more details.


Here're my cards using Christmas Tree 1 and Leaves 2.


For this CAS card, I'm showcasing Christmas Tree 1 stencil. I first applied mowed lawn and peacock feathers distress inks on white cardstock.

Moved the stencil slightly and also drew the tree outlines with black pen. 

Then, I cut the cardstock to isosceles triangle shape and adhered it to kraft card.


I also stamped the sentiment below the tree, so the sentiment looks like tree stem.
To finish off, I added a red star on the top of the tree.

-------------------------------------------------------------------------------------------------


For the second card, I started by putting the stencil on white panel and applying embossing paste.
I also embossed the paste in gold.

Next, I adhered the panel on the center of card with foam for some dimension.


To finish off, I cut the sentiment from Be Jolly Phrase Die.


Thank you for standing by!

Friday, July 7, 2017

STAMPlorations Monthly Challenge #45手工卡片

Hello Friends! 
STAMPlorations每月手作卡片挑戰賽。


This month our challenge theme is STAMPS & WARM COLORS. 
Warm colors: reds, yellows, oranges, and beige or creamy colors


Friday, June 16, 2017

Sunday, April 9, 2017

彩印手工卡片 (使用塑膠版型、泡泡筆、變色龍麥克筆)

Hi friends! Happy Sunday! 
Today I'd like to share two card with you.


I had so much fun playing with the Kodomo Popcorn Pen and had a idea to create this card.


To create the cake icing, I used White Popcorn Pen. This pen is very easy to use. After applied the pen on the cupcake from STAMPlorations stamp set-Party Mates, blasted the area with a heat gun, and it puffed out like magic. I also colored the cupcake with Chameleon pens.

Then, I put the Plaid Maker stencil from STAMPlorations onto white paper and apply pink ink to create the background. I cut the background apart, and adhered them to white card.

To finish off, I adhered cupcake with foam tape, stamped the sentiment in black.


I'm entering to the following challenges:
CASology Week 243: ICING
Simon Says: Happy Birthday
-----------------------------------------------------------------------------------------------------------------


For the second card, I tried to use some bold and deep colors.


I chose Volcano Lake color as my cardbase, put the Broken Glass stencil from STAMPlorations onto it. I didn't apply ink but colored with Chameleon pens (aqua marine and royal blue).

Then, I stamped the bear and giraffe from Altenew Geometric Menagerie Stamp Set in black.
 I chose the lion as theme, colored with Chameleon pens and adhered it with foam tape.

Lastly I heat embossed the sentiment in white. I just love how this card turned out.


I'm entering to the following challenges:
ATSM Challenge #236 - Anything Goes


Friday, April 7, 2017

STAMPlorations Monthly Challenge #42 蝴蝶手工卡片

Hello Friends! 
STAMPlorations每月手作卡片挑戰賽。

This month our challenge theme is STAMPS & WINGS 


(If you are interested in STAMPlorations products, you can use my personal DT discount code to get 20% off on all stamps, stencils, and dies! CODE:  STAMPGIRLWEIWEI)


First, I put the stencil on white card base, using blending tools and inks to color it.
After the colors dried, I used black pen to draw the white space around of flowers and leaves.

For the theme, I stamped the butterfly in black, colored with markers and cut it out.
I adhered the butterfly onto the vellum.

To finish off, I heat emboss the sentiment in white.


Hope you play along with us! 
Please visit the STAMPlorations blog to check out other talented DT's creations.
Wei Wei ----It's me.


Thank you!


I'm entering to the following challenge
ATSM Challenge #236 - Anything Goes

Wednesday, April 5, 2017

STAMPlorations Things with Wings Spring Blog Hop & Linky Party 蝴蝶彩印手工卡片

Hi friends! Welcome to STAMPlorations Things with Wings Spring Blog Hop & Linky Party. 

For this event, We are showcasing spring-themed projects (cards, ATCs, tags, postcards, etc.) that have wings (birds, butterflies, dragonflies, etc.). What a great and fun event! 


thingswithwingsspringhop.png

Friday, February 3, 2017

STAMPlorations Monthly Challenge #40 手作卡片

Hello Friends! 
STAMPlorations每月手作卡片挑戰賽。
. 
This month our challenge theme is STAMPS & RETRO. 
Our definition of Retro: anything and everything vintage; with a vintage theme or feel; vintage/old elements and ephemera; retro design.


Friday, January 6, 2017

STAMPlorations Monthly Challenge #39 手作卡片

Hello Friends! 
STAMPlorations每月手作卡片挑戰賽。
. 
This month our challenge theme is STAMPS & MIXED MEDIA. Our definition of mixed media: using stamps and ink + at least 2 other elements (techniques and/or products).


.


This is a mixed media card. I started by creating the background using embossing paste and Bloom Boldly - ARTplorations Stencil. 
 After embossing paste dry, I apply some orange, yellow, and blue colors.


I also heat emboss the sentiment from VIGNETTE: Tree Silhouettes in white.

To finish my card I add some sequins.


Hope you play along with us! 
Please visit the STAMPlorations blog to check out other talented DT's creations.
Shery
Wei Wei ----It's me.

Thank you!


I'm entering to the following challenge
 Paru's Card Making Challenges-Ist anniversary challenge!

Thursday, December 15, 2016

ARTplorations Stencil Blog Hop Day2 手作卡片

I hope you enjoyed yesterday’s post.

artplorationsstencilhopdec2016.png


First, I put the stencil on kraft, apply white ink on it.
After the ink dry, I color the peony with watercolor pencils.

The sentiment is from Smile - Dee's Artsy Impressions.

To finish off, I add some pearls on the center of peony.

首先, 將塑膠板型固定在牛皮卡紙上,接著直接蓋印白色印台。
待白色印台乾了以後,使用色鉛筆上色。
字章是來自Smile - Dee's Artsy Impressions印章組。
最後,在花的中央貼一些半珠當作花蕊。


Hope you like my card! Have a nice day.


Wednesday, December 14, 2016

ARTplorations Stencil Blog Hop Day1 手作卡片

Hello there everyone! Today is the start of the ARTplorations Stencil Blog Hop . 


artplorationsstencilhopdec2016.png

I want to share two cards using Bloom Boldly - ARTplorations Stencil.
One stencil, Two styles.

今日分享的兩張卡片全是使用STAMPlorations Bloom Boldly - ARTplorations Stencil 的塑膠版型。 雖然是用同一的版型,但卻有不同風格。


For the first card, I put the stencil on white card base, using blending tools and distress inks to color it.

After the colors dry, I use black Zig real brush pen to draw the white space around of flowers and leaves.

Then, I die cut the hugs word on vellum, and heat emboss the sentiment in white.
I adhere the vellum to the left side of the card. 

To finish off, I add another die-cut hugs word on the vellum.

第一張卡片,首先將版型固定在卡紙上,使用海綿工具及印台推色。
拿掉版型,等顏色乾掉之後,特別用黑筆描繪花朵和葉子周圍的白邊。
接著使用hugs刀膜切割透名描圖紙,並且在同一張描圖紙上蓋印字章及燙凸。
最後,同樣使用hugs刀膜切割金色卡紙,將切割完成的hugs固定在描圖紙上,卡片即完成。


For the second, I use the same stencil, apply the same colors, but I don't add black color around the flowers and leaves.

For some interest, I add the die-cut amazing word, and heat emboss the sentiment in white.

第二張卡片,使用同一款塑膠模板,以及使用相同的上色技巧。但是這張卡片沒有特別用黑筆描邊,而是保留原本的白邊。
為了使這張卡片有趣些,使用amazing刀模,以及蓋印字章在黑紙上後燙凸。


Hope you like my cards, and join with us!

Friday, November 18, 2016

STAMPlorations Monthly Challenge #37 reminder post 手作卡片

Hello Friends! 
This is reminder post of STAMPlorations Monthly Challenge. 
STAMPlorations每月手作卡片挑戰賽。
. 
This month our challenge theme is STAMPS & 3 OF ANYTHING 


Here is my DT card.


I first cut the word three times using Amazing Word Die and also use Crazy Double Running Stitch Rectangle Nesting Dies to add some interest around the edge of white panel .

Next, I put the ARTplorations Stencil named Broken Glass on the panel, apply some ranbow colors, and then heat emboss with clear embossing power.

To finish off, I adhere the panel to black card.

製作步驟:
首先用Amazing Word Die 刀模在白色卡紙上切割三次,並且使用Crazy Double Running Stitch Rectangle Nesting Dies切割卡紙,就可以看到卡紙周圍有縫線效果。
將Broken Glass 遮蔽版型固定在卡紙上,使用塗抹工具及彩紅色印台,慢慢將顏色融合在一起。趁著顏色未乾,倒上透明燙凸粉,再用熱風機吹融,就可以有透明光亮的效果。

最後,使用泡棉膠將卡紙黏貼在黑色卡片上,卡片即完成。


Hope you play along with us! 
Please visit the STAMPlorations blog to check out other talented DT's creations.
Wei Wei ----It's me.


I'm entering to the following challenge

Lulupu  Geometric challenge

Thank you!
Related Posts Plugin for WordPress, Blogger...