Friday, December 25, 2020

Light up shaker December daily


Hi friends, Merry Christmas!

Today I'm up on Chibitronics blog with this light up shaker page in my December daily.

let's take a look at my finished page:


As you'll see above my page is very fun and easy to do. I first printed my traveler’s notebook pages. When I saw this snow ball paper, I know I will make a shaker. I cut out those three snow balls as my shaker windows and then backed with a piece of acetate to cover those windows.


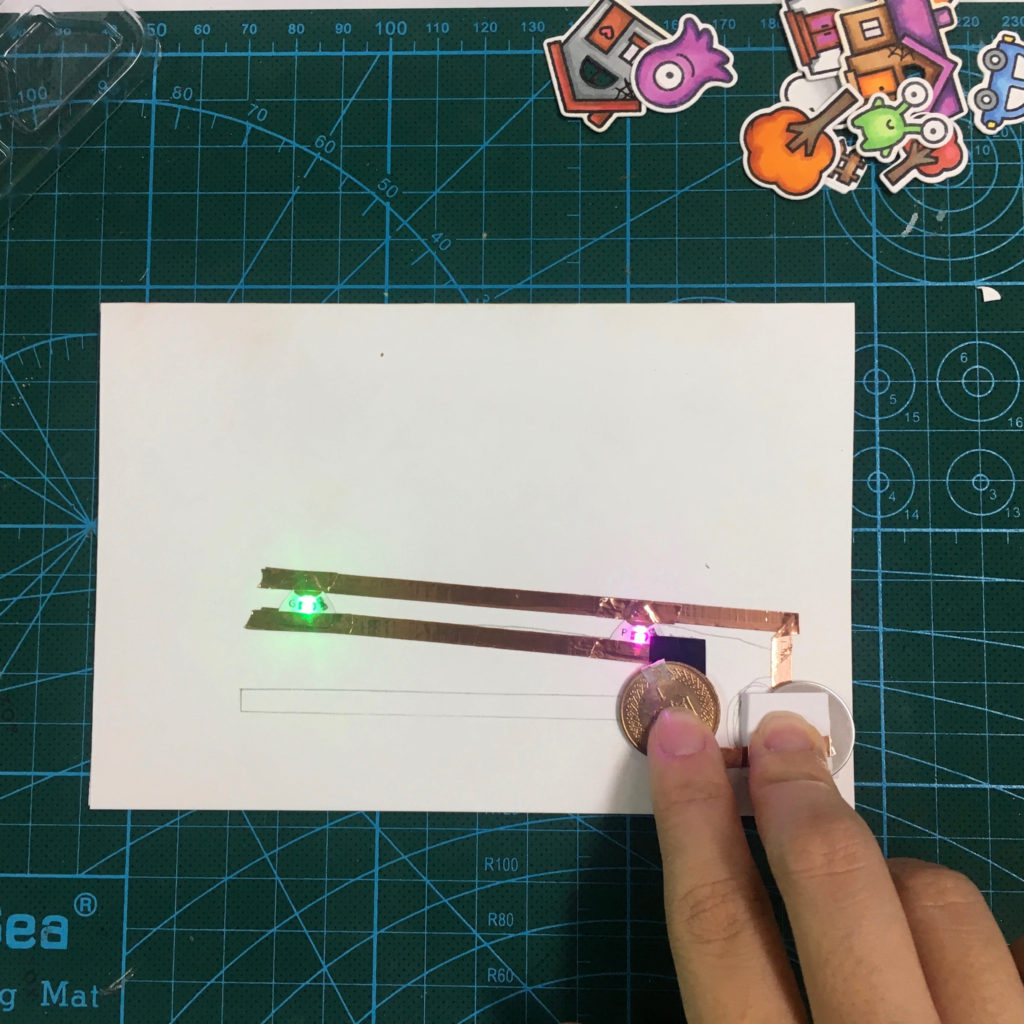
I created a parallel circuit on my foundation page. After applied the copper tape, I added blue, red, and white LEDs. Then, I covered my circuit with the snow ball images that I cut out before. I’m not afraid that covering the circuit affects the LEDs lighting effect because paper is thin so the LEDs can light through easily.


Next, I added some shaker elements and I adhered the shaker windows and foundation page with 3 D foam tape. This was seriously so fun to make and just made me happy while making it.

That is all from my side today. Thank you.

Wednesday, November 25, 2020

Light up card using pressure sensitive conductive plastic

Hi friends, Today I am up on the Chibitronics blog with this adorable fairy friends card showcasing the pressure sensor conductive plastic.

This card is very easy to do. The only different is that I added the new product - pressure sensitive conductive plastic!

I started by creating the inking background with distress inks and blending tools. The little fairy friends, flowers and house are from Lawn Fawn. I stamped them in black, die cut and colored with Copic markers. I also cut tree using die cut.

Like always, the circuit I used is parallel circuit. I put a pressure sensitive conductive plastic on the battery holder. When you press, the light will become brighter the harder you press. This conductive plastic sheet is perfect for making DIY pressure sensors and adding a gentle fade in and fade out effect to your project.

After finished the circuit, I assembled those images and adhered them to my front card. To finish, I stamped the sentiment in black and added some sequins for more interest.

That is all from my side today. Thank you.

Sunday, October 25, 2020

Halloween Light Up Card Using Chibitronics Pressure Sensor Conductive Plastic and Lawn Fawn Stamp

Hi friends, It’s Wei Wei here. Today I would like to share this Halloween card showcasing the pressure sensor conductive plastic.

This conductive plastic sheet is perfect for making DIY pressure sensors and adding a gentle fade in and fade out effect to your project. Just sandwich a piece of this material between your paper switch to turn it into a pressure sensor!


I started by creating the Halloween spooky background with distress inks and blending tools. The little house images are from Lawn Fawn. I stamped them in black, die cut and colored with Copic markers. I also cut a black paper sheet to be the road. Next, I adhered the black paper sheet to the inking background, and cut a path for driving the car.


The circuit I used is below:


I used one penny to make the car into a spinner. Since penny is made of copper, it is a great conductor of electricity! When you slide the car from left side to the right of the card, the penny behind the car can conduct electricity, so the houses light up! I also added pressure sensor conductive plastic in order to get fade in and fade out effect.


You can check out a tutorial here that shows you how to make this card. please click my youtube channel.

That is all from my side today.

Thursday, October 1, 2020

Introduce: STAMPholic Shop printable traveler's notebook release - Autumn

Happy autumn, friends! I can't believe it's already in October!
today I'm going to bring with seasonal printable traveler's notebook papers. Click here for everything that's new in the shop.


thank you for standing by.

Friday, September 25, 2020

Light up + Double slider card

Hi friends! Today I'd like to share this light up + double slider card using Chibitronics red LED sticker and Lawn Fawn Charge me up stamp set.

Here is my card:


I also made a process viede to show how to create my LED circuit and double slider mechanism: https://youtu.be/8GOit84k0do


Thank you.

Tuesday, September 1, 2020

Introduce: STAMPholic Shop printable traveler's notebook release - Halloween

Hello, everyone! I can't believe it's already in September!

I still spent lots of my time to make my design into digital. As you can see, I make twelve Halloween printable traveler's notebook papers. Click here for everything that's new in the shop.


thank you for standing by.


Monday, August 10, 2020

Introduce: STAMPholic Shop printable traveler's notebook release - Summer series

Hi friend, today's STAMPholic Shop update is a big Summer printable sets for traveler's notebook. Click here for everything that's new in the shop.


Thank you for standing by.

Thursday, June 25, 2020

Light up Mini Album using Chibitronics and Crate Paper

Hi friends! It’s Wei Wei with you today! Today I share my mini album using Chibitronics LED stickers.


First, I created the album cover with chipboard and pattern papers from Crate Paper.
To decorate the cover, I added the cute house ephemera piece, and decided to make it "light up" . So, I cut out some holes on the windows and backed with vellum for LEDs light through. The circuit I used is parallel circuit, because I want to turn on multiple LEDs with one battery.


The battery holder was hidden behind the circle embellishment. And I added Velcro so that the circle embellishment can be detached easily and remove the battery.
After finished the circuit, I layered the house with lace paper and floral embellishments . I also added car chipboard sticker and heart chipboard stickers for more interest.

Here is the inside of my mini album.

That is all from my side today. I hope you were inspired and give Chibitronics products a try! Have a great day.

Thank you

Saturday, April 25, 2020

pop up + light up card using Chibitronics and Waffle Flower stamp

Hi friends, Today I'm up at Chibitronics blog with this adorable pop up and light up card using Chibitronics Red, Yellow, Blue MegaPack (30 stickers) and Waffle flower stamp set.

There’s a video of the process at the end of this post if you want to watch that instead of reading.


I first stamped those adorable images in black, colored with markers and fussy cut out. I also used Distress inks and blending tool to create the background.


The photos above are my pop up mechanism. 


The photo above, I show you the circuit I used in my card.


I made a step by step video or you can watch it over on my YouTube Channel.


That is all from my side today. I hope you were inspired and give Chibitronics products a try!
Have a great day.

Thank you

Wednesday, March 11, 2020

Introduce: Rose and Daffodil digital stamp sets

Hi friends,
I'm introducing the gorgeous Rose digital stamp set and Daffodil digital stamp set!


I know you are dying to take a closer look at this two digital stamp set.


As you can see, this two digital stamps contains flowers, stem and leaves. The Daffodil digital stamp set even contains the entire flower.

Here are my cards.


Thank you for standing by.

Tuesday, March 10, 2020

Introduce: Fuchsia Flower and Hummingbird Digital Stamps

Hello friends! 
Thank you so much for joining me again.
 Today I'm revealing two sets from my very first collection! Just a reminder, all of my new products is available at ETSY (STAMPholicshop) for purchase!


--------------------------------------------------------------------------------------------------


The Fuchsia Flower digital stamp set includes some separate Fuchsia flowers and leaves and one stand alone Fuchsia flower set.
The Hummingbird digital stamp includes two separate birds and one sentiment.

You can resize, arrange or layer the these images easily on your computer, or you can print them out, fussy cut out, and layer them with glue or foam tape.

Here are my cards featuring this Fuchsia flower digital stamp and Hummingbird digital stamp.


Thank you for standing by! 

Related Posts Plugin for WordPress, Blogger...