Hello everyone! It’s my turn to share my project for Chibitronics! and I’d like to share with you a traveler's notebook cover I created with the Chibitronics LED stickers and beautiful embellishments from Felicity Jane, Altenew and Crate Paper.
It is no secret, I'm a traveler's notebook addict, I love to document my daily life story in my TN. I love the TN format as it allows me to combine the graphic look of a scrapbook page and the journal look of my dairies.
Here are the guidelines for the challenge: 1.Create a TRAVELER'S NOTEBOOK spread based on the CHALLENGE THEME. 2.Create a new, not previously posted project.
3.You are welcome to combine other challenges.
4.If you have a blog please include the challenge graphic in your post.
5.You can link to social media if you don't have a blog. If you show your project on IG, please make sure to use #lovetoscrapontn9 and #lovetoscrapontnchallenge so I can find you.
6.You can submit multiple projects but they must be posted to InLinkz or social media separately.
7.If there are less than 3 entries to the challenge, no winners will be chosen.
8.Most importantly have FUN!
The challenge closes on the October 13 at 6 am Pacific.
Will announce challenge winners on the October 15.
The top winner will have chance to be our guest DT!
Thank you for visiting today.
Hope my challenge inspires you. Be sure to show me what you've made because I love to see your work and hand out prize.
Hi friends, Today I have this super fun scrapbook layout made with Chibitronics LED sticker, Felicity Jane kit and Echo Park stickers, as well as Citrus Twist stamps.
I love the loving and cozy vibes living room on my layout!
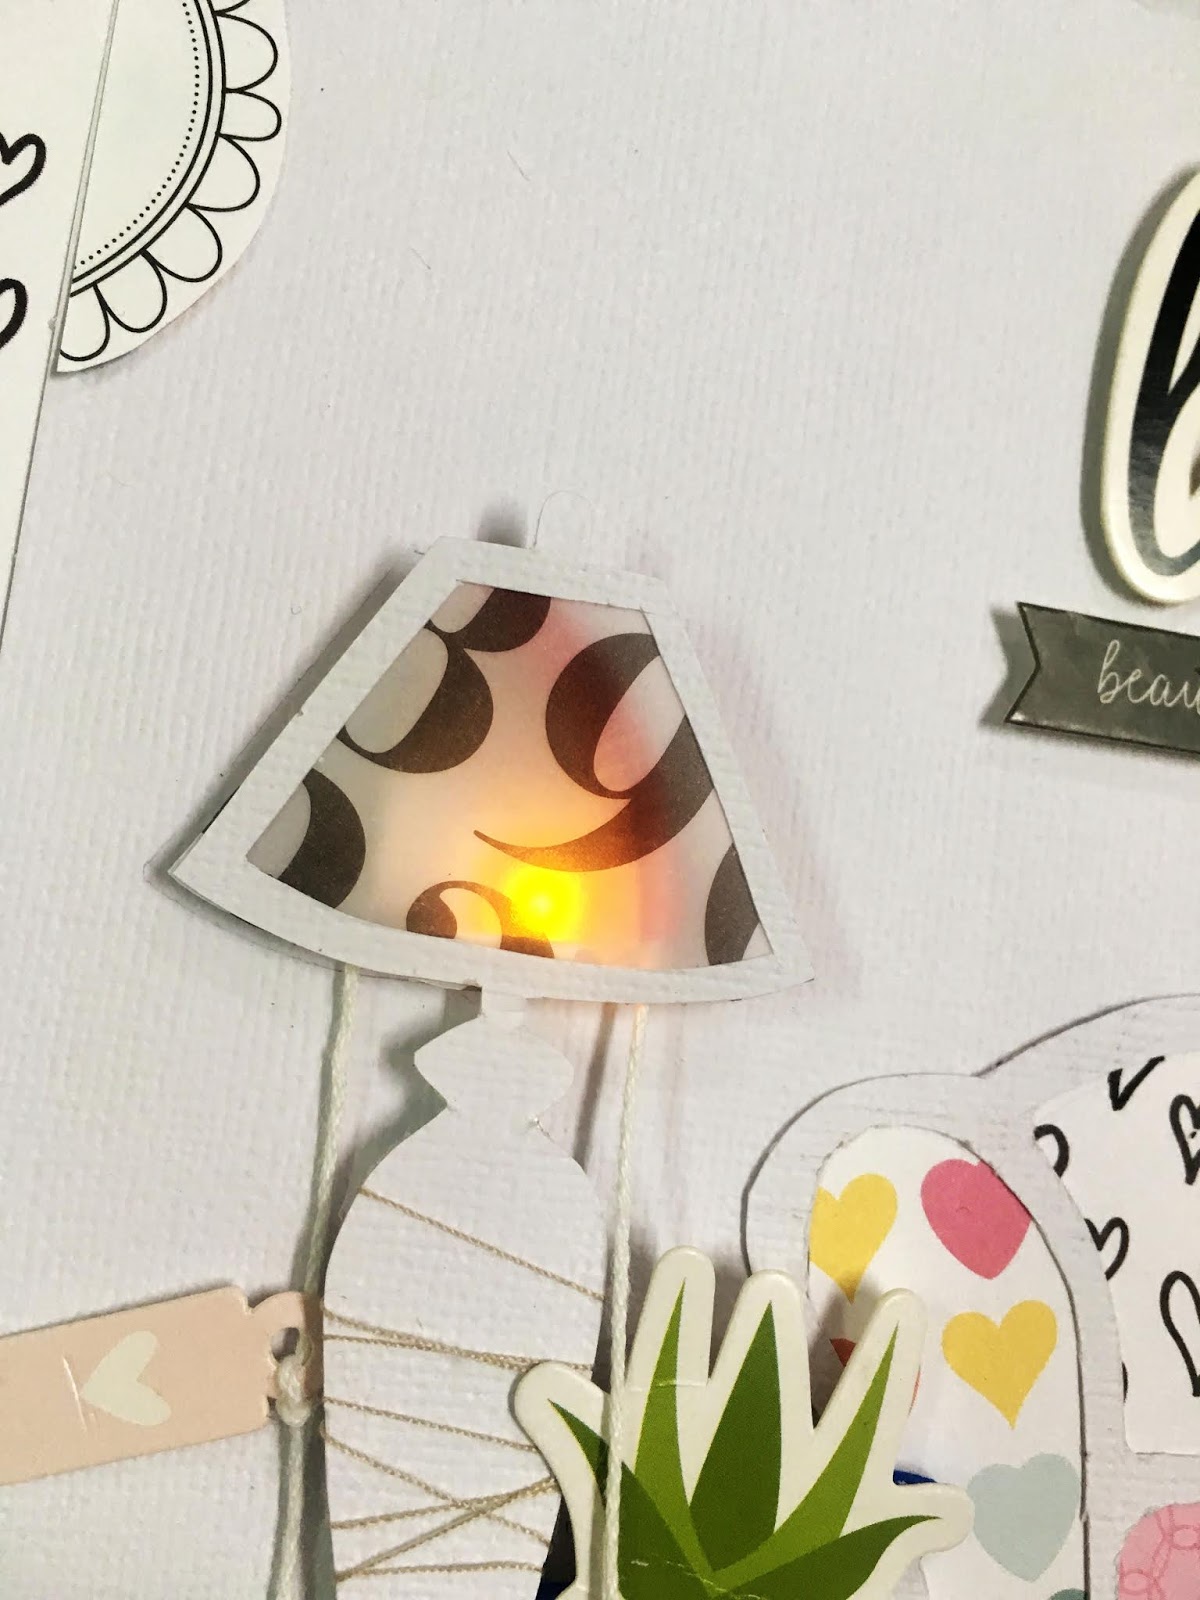
First, I cut out a sofa and lamp shape with scissors and exacto knife and backed it with some pattern papers from Felicity Jane. Since I want to make the lamp light up, I chose patterned vellum instead of solid paper to layer the lamp.
I cut two holes on the scrapbook background, one is for LED lighting through and the other is for battery. Then, I drew the circuit sketch on another paper.
Then it’s time to start putting the copper tape and yellow LED sticker down the pencil sketch line.
For the switch, I started off cutting the slit with an exacto knife. The mechanics attached underneath the "switch" is the thing that two squares folded in half, butting up against each other and wrapped with copper tape. That will bridge the gap in the circuit to turn the lights on.
As the photos show above, when the "switch" down, the copper tapes are connected to the battery, and the LED is lighting, and vice versa.
I also tied two threads to the up and down sides of the "switch". In this way, the function of the threads just like the "switch" of lamp.
To make the thread which is on the up side can be pull easily, I added a curved straw beside the "switch" and make the thread through it.
Next, I adhered the lamp with foam tape to create dimensions. I also scattered embellishments and stickers around my page.
The lamp is turned on while pulling the left thread, and turned off while pulling right thread.
I layered my photo with some embellishments from Felicity Jane and Echo Park.
As a final touch, I stamped some sentiments from Citrus Twist.
I hope you like my new scrapbook layout and it will inspire you to create something pretty with Chibitronics LED sticker.
There is still time to play along with the current challenge at Love to Scrap on Traveler's notebook! You have until April 14 at 6am Pacific to submit your creation and I'd love to have you join me!
The challenge theme of this month is: Sketch.
Here is my TN spread.
On this challenge, I offer a little prize personally if there are more than 12 entries to the challenge.
Photo Source : http://www.citrustwistkits.com/
Prize will be drawn randomly using Random.org.
****
Here are the guidelines for the challenge:
1.Create a TRAVELER'S NOTEBOOK spread based on the CHALLENGE THEME.
2.Create a new, not previously posted project.
3.You are welcome to combine other challenges.
4.If you have a blog please include the challenge graphic in your post.
5.You can link to social media if you don't have a blog. If you show your project on IG, please make sure to use #lovetoscrapontn3 and #lovetoscrapontnchallenge.
6.You can submit multiple projects but they must be posted to InLinkz or social media separately.
7.If there are less than 3 entries to the challenge, no winners will be chosen.
8.Most importantly have FUN!
The challenge closes on the April 14 at 6am Pacific.
Will announce challenge winners on the April 16.
The top winner will have chance to be our guest DT!
Thank you for visiting today.
Hope my challenge inspires you. Be sure to show me what you've made because I love to see your work and hand out prize.
Happy weekend! Today I'd love to share this card and traveler's notebook layout .
I stamped layered orchid images from ALTENEW stamp set with VersaCraft inks and trimmed them out. Then, I arranged them and added some foam tapes for dimension.
I stamped the label sentiment which is also from ALTENEW stamp set and then trimmed them out.
Finally, I finished it off with nuvo cryatal drops. Here's a closer look:
Next...is my traveler's notebook spread about last Friday dusk.
This traveler's notebook was handmade by myself. I added flower pattern papers, white papers, and some vellum in it.
I printed the photo, stamped the sentiment from Felicity Jane stamp in white, and adhered it onto the vellum. I also stamped "GOOD NIGHT TAIPEI" with Kelly Purkey stamp on vellum, and put them to the right side of page.
To add some interest, I added the ballet-dancer behind the vellum.
Here's a closer look:
On the left side, I made a pocket using Cocoa Vanilla Studio's pattern paper. Embellished with flower, tag, label, and nuvo crystal drops.
I added a shaker pocket with Cocoa Vanilla Studio's pattern to the vellum.
Hi friends, I'm back with you today to two traveler's notebook spreads using the some beautiful kits, such as Felicity Jane, Kelly Purkey, Simple Stories, and so on.
This first spread is about my little trip to Jhuzihu of Yangmingshan, Taipei. The Hydrangea of Jhuzihu are in their prime now. Their colors are both abundant and diverse, love them so much!
I wanted to make my spread look like "project life", so I began by cutting my photo to many little parts.
After arranged my photos, I also added some little pattern papers.
Above the photos and pattern papers I stamped some sentiments and images, and then added some cute stickers and embellishments.